
The CertifierOS Asset Bulk Upload Tool allows certification bodies to efficiently register multiple producer sites and products via an Excel template that links products to sites using temporary IDs, requires specific data entries such as producer GGN and certification body ID, supports up to 1000 rows per upload, and includes validation and error correction steps before final import to the system .
Key capabilities
Registration of Assets
Producer´s Assets (Sites and Products) can be created for every registered Producer/PG in CertifierOS by using the producer´s/PGs GGN as the reference.
Note: The Producer/PG itself must be created before starting to use the Asset Bulk Upload Tool.
End-to-end process flow:
1. Open the Products/Sites/PHU Browser overview and click on the arrow next to “Add Product/SitePHU”. The dropdown contains the bulk import option
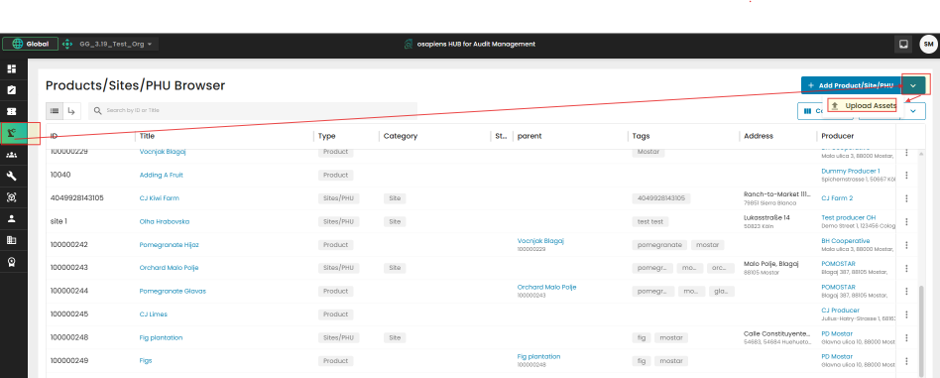
The system will open “Import Product Data” page where you will find the “Download Template” button.
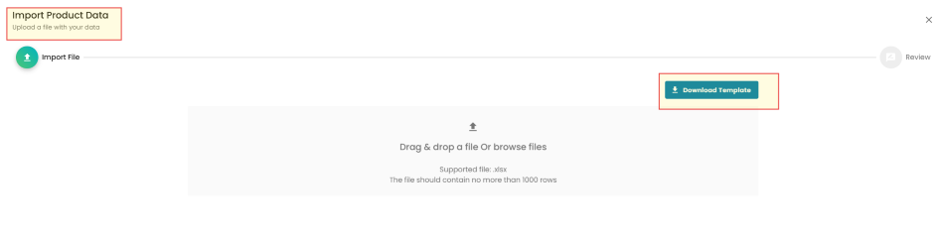
2. Download “Product Upload Template”
Note: Although the Excel file is named “Product Upload Template”, it is used for both product and site uploads.
The system will download the template. This template must be used to register/create Sites and Products
How to fill in Site and Product data in the Excel sheet for each row:
Column “A”: Temp ID
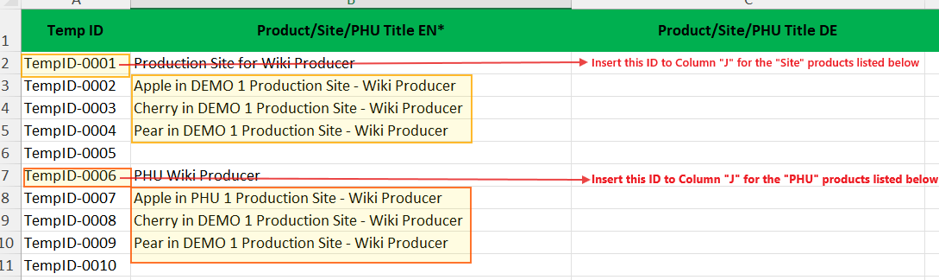
Column “A” is mandatory and predefined by the system. Do not edit or use it. This row contains the “Temporary Asset ID,” which the system uses internally to link products to their corresponding sites (see Row “J” Parent ID (Site/PHU)). After the upload is completed, the temporary ID is replaced by the CertifierOS Asset ID.
Column “B”: Product/Site/PHU Title EN* - Mandatory
Asset Name must be filled for every row. Please follow the wiki guidelines How to name sites, PHUs, products and audits - GLOBALG.A.P. Wiki Site
Columns “C, D, E, F and G”: Additional Product/Site/PHU Title language options
DO NOT USE!!! These columns have no function for the time being.
Column “H”: Asset “Type”
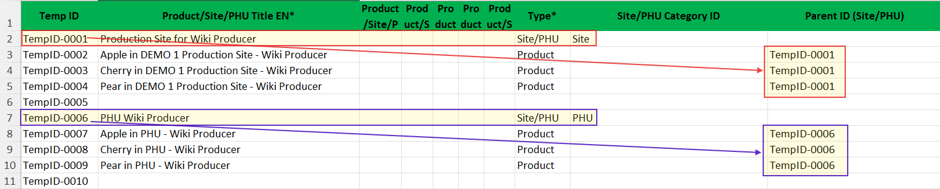
In this column corresponding Asset Type “Site” or “Product” needs to be selected in a dropdown menu
Column “I”: Site/PHU Category ID
Information in this column provided in a dropdown menu will only be filled when creating “Sites”.
“Products” DO NOT HAVE A “CATEGORY”!!!
Column “J”: Parent ID (Site/PHU)
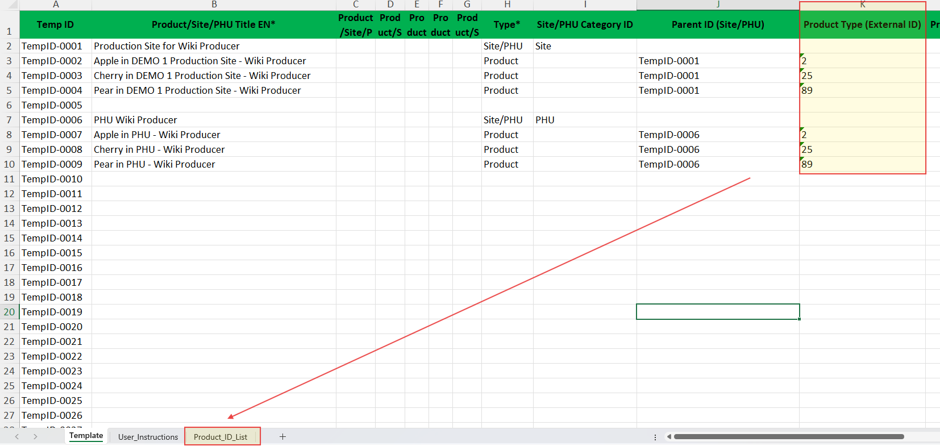
This column is important. It uses the “Temporary ID” from Column “A” of the site being created to link each product to its parent site.
How it works:
Column “K”: Product Type (External ID)
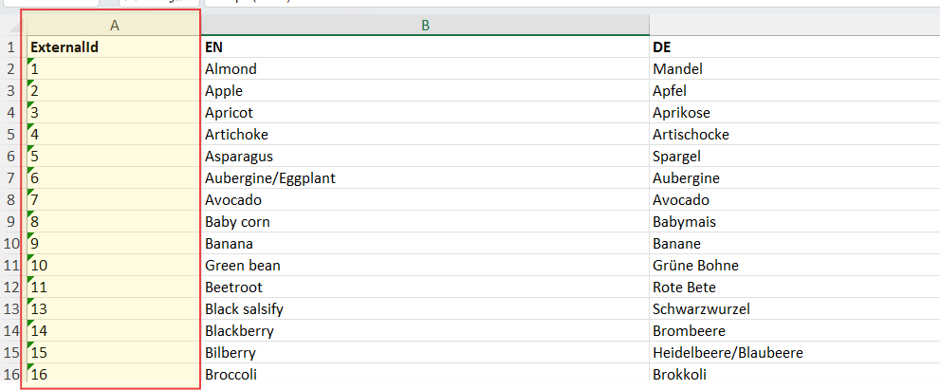
Column K contains the Product Type code used by the Asset Bulk Upload Tool. The available codes are listed in a separate sheet within the Excel template.
Use only Product codes provided in the Excel template under column “A” - ExternalID
Column “L”: Producer ID (external GGN)
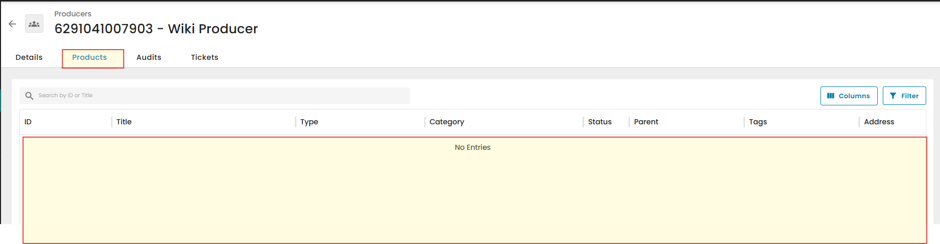
Column L contains the producer’s GGN, which determines which producer the assets (sites and products) are assigned to. In this example, GGN 6291041007903 belongs to “Wiki Producer,” which currently has no registered assets.

Note: Assets can be created for multiple Producers/PGs in one upload file. In this case the Producer/PG GGN will be added to each Asset´s column "L" to be linked to that particular Producer/PG. See screenshot below:

Columns “M, N, O, P and Q”: Asset Address
Note: Use these columns only for Site addresses. (Geocoordinates will also become available in a future update). Products do not contain address fields; therefore, please leave these columns blank for product rows!!!
Enter required information for Site address. Important: All “Site” address columns must be filled in!!!
Column “R”: Country (Address)
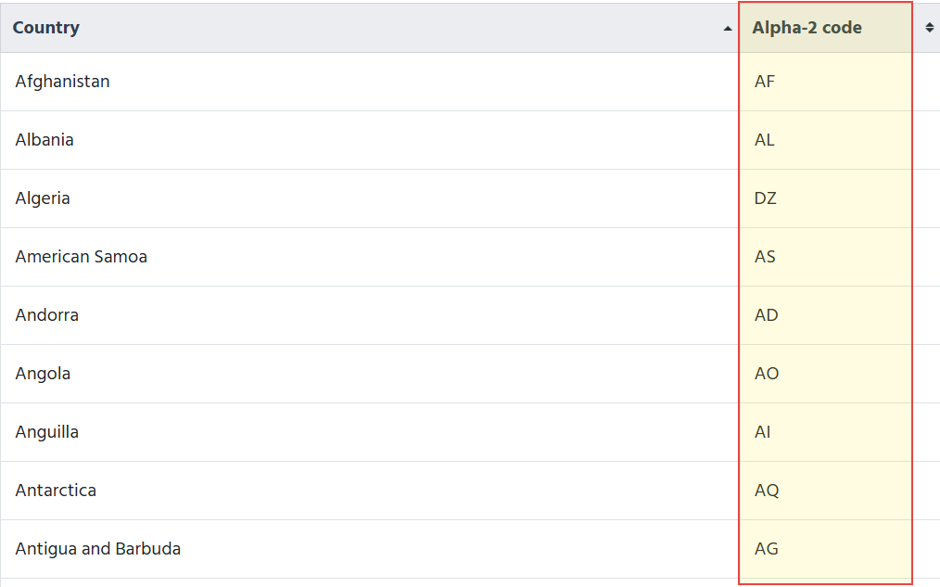
Enter ISO alpha-2 County code
Column “S”: Certification Body ID
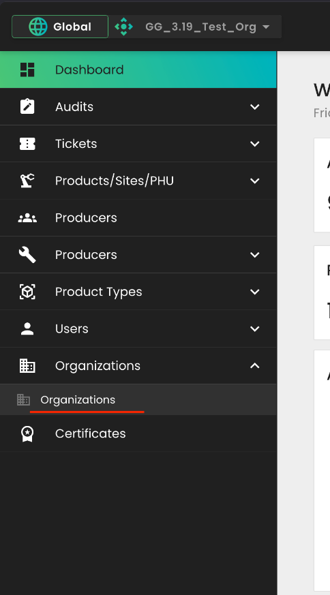
Certification Body ID must be correct and consistent. It represents CB´s Name in CertifierOS not the CB Number registered with CB-AT!!!. Your CB's "Organization ID" can be found in CertifierOS under "Organizations":
Column “T”: Tags
Here CB can tag Sites and Products using their own tagging system.
VERY IMPORTANT: Do not rename, delete, or move template columns.
The completed upload file should match the format shown in the example provided in this wiki.

Required steps for data registration:
Data Import limitations:
3. Upload Excel File
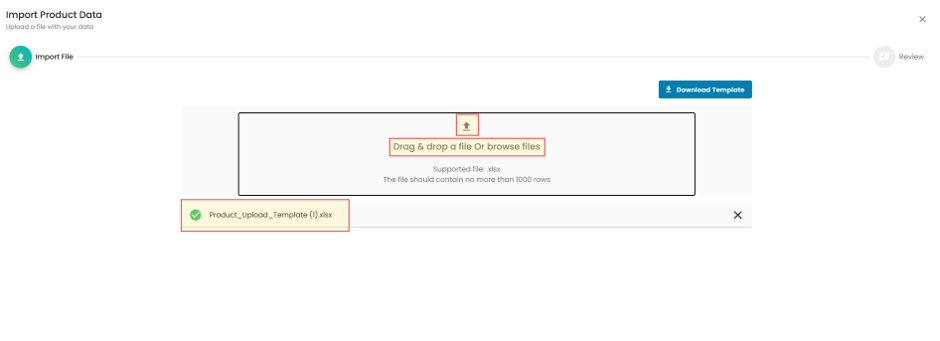
Drag and drop the upload sheet into the dedicated upload area on the Upload page or browse your files to select it.
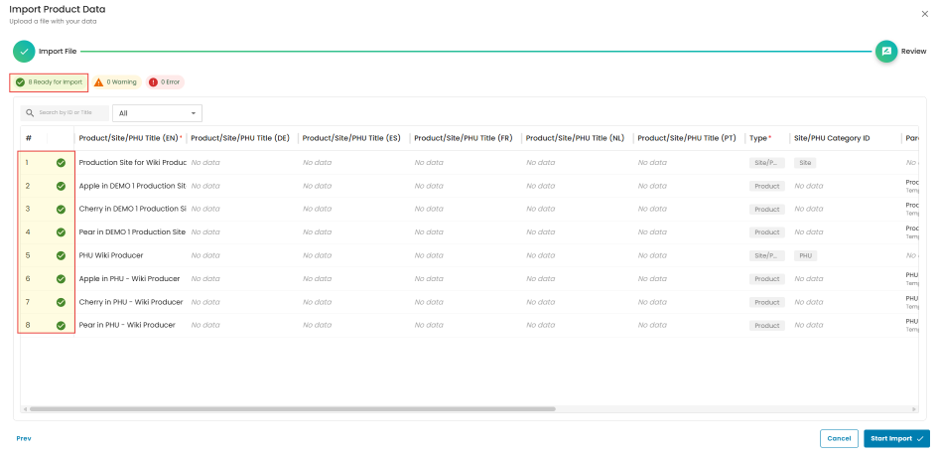
6. Review Preview
The system validates the Excel data and displays the import preview.
After clicking Start Import, confirm the number of items to be imported.
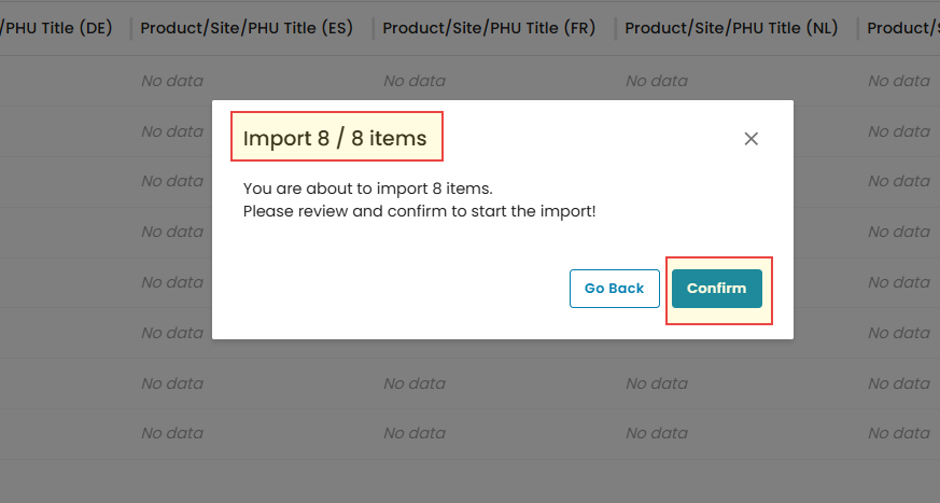
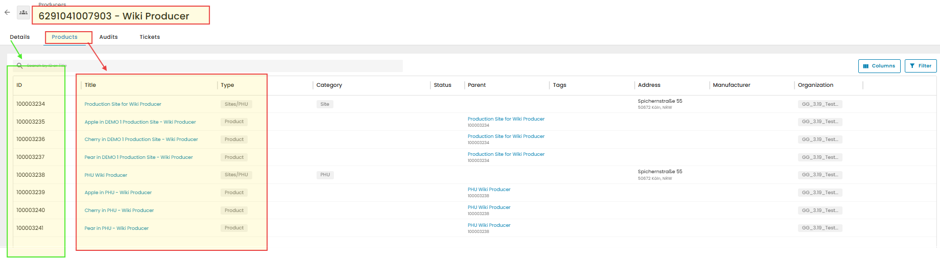
After confirmation, the records are created in the Producer master data, and all asset “Temp IDs” are replaced with the CertifierOS Asset ID.
Common issues and quick fixes
Download a fresh template and avoid changing column headers or workbook structure.
Correct mandatory fields, invalid values or missing Certification Body ID, then re-upload.
Split into multiple Excel files and import them separately.